

How to Enable Automatic Updates in iOS 12 (Guide)
Launched at the WWDC 2018 keynote, the iOS 12 update brings many new changes, including ARKit 2, tools to promote digital wellness, more Animoji (and Memoji, if you lot want an animated version of yourself), Siri Shortcuts, Grouping FaceTime and a whole lot more. Autonomously from these major features, some other new characteristic that the Cupertino giant has added to its OS is the power to automatically update the device. Yes, that's right, users volition now be able to automatically update their iPhones and iPads to the latest iOS versions in the background as and when they come. Well, if you'd like to do that too, read on, as we show you how to enable automatic updates in iOS 12:
Enable Automated Updates in iOS 12
Note : I tried the following method on my iPhone X running iOS 12.0 Beta, and the method worked only fine.
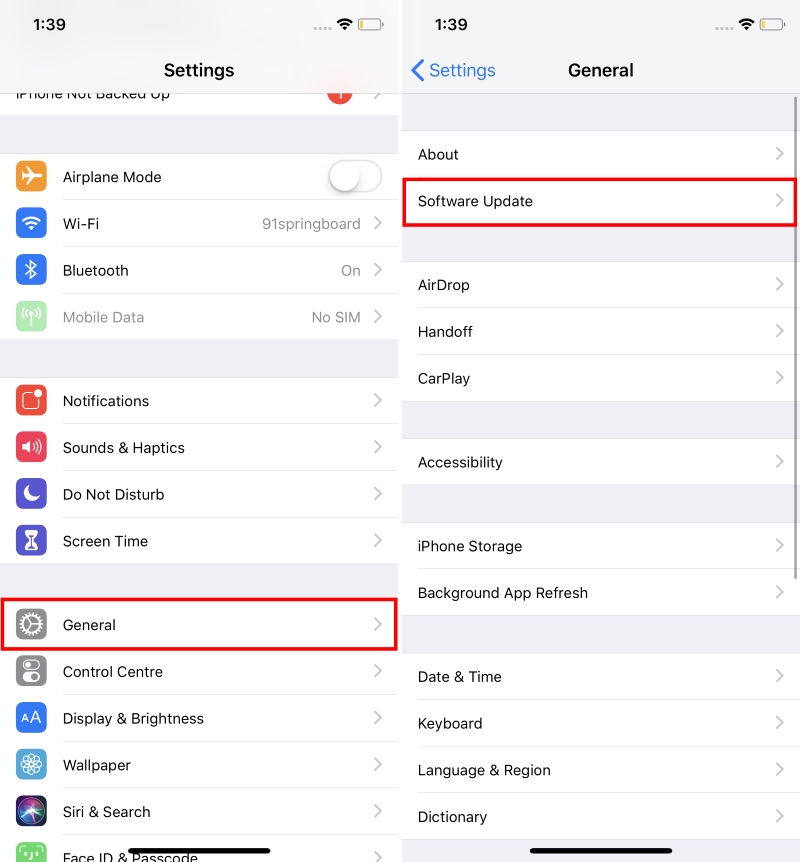
1. First off, caput over to Settings -> General -> Software Update.
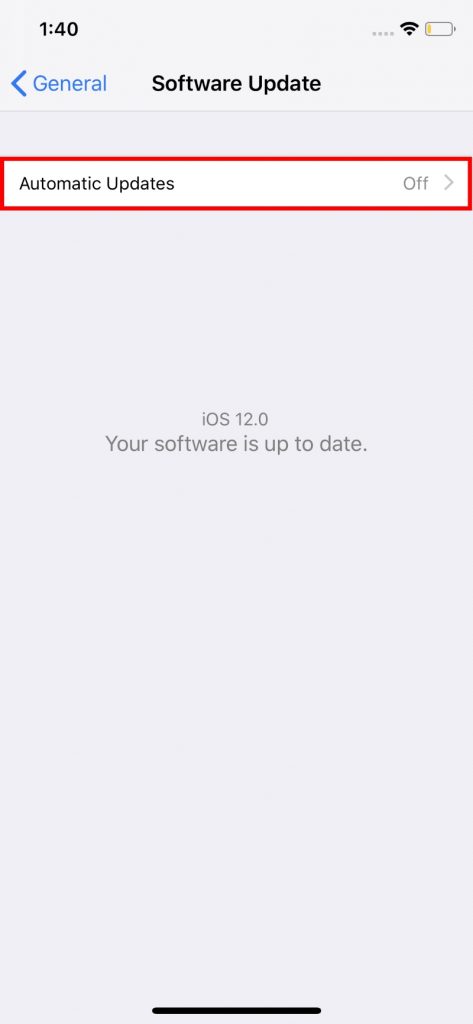
2. The phone will showtime bank check for any new updates. Now, tap on "Automated Updates".
3. Just enable the toggle next to "Automatic Updates".
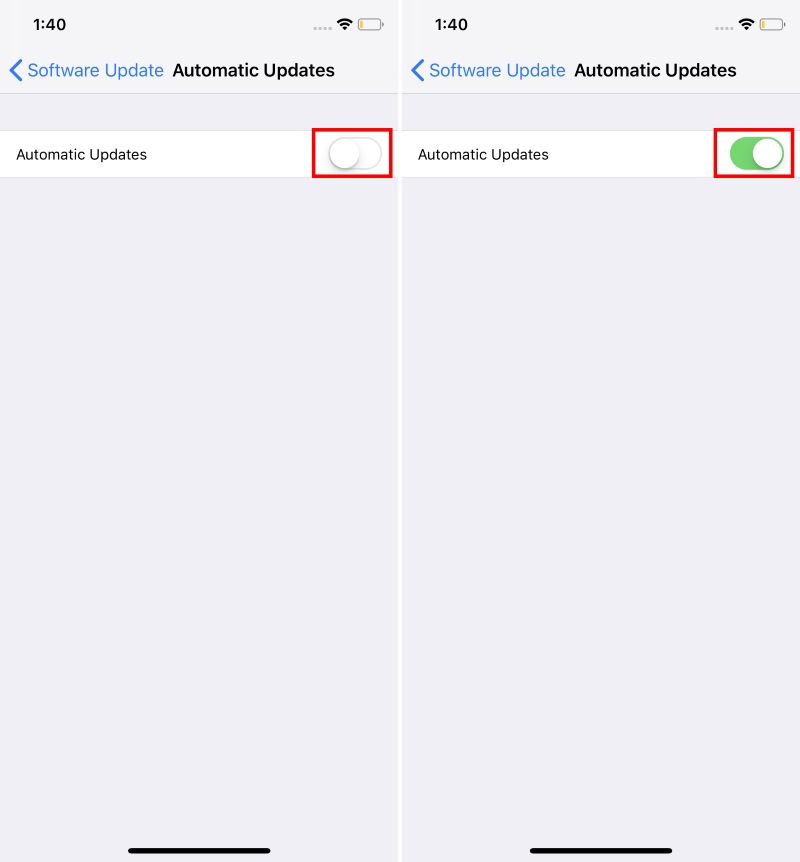
And that'south it. Your device will now automatically search and download iOS updates in the groundwork, whenever they are released.
Encounter ALSO: How to Fix Up Multiple Faces for Face ID in iOS 12
Update your iPhone Easily with Automatic Updates
Well, that was pretty much information technology. While not a major feature in itself, it will certainly raise the overall user experience, by assuasive the user to easily update his/her device to the latest iOS versions as and when they are launched. And enabling this feature isn't that difficult either. Well, I have enabled in on my device, for I love to stay on the latest versions at all times. Simply what about you? Would you be using this feature? Allow united states know in the comments down below.

Source: https://beebom.com/how-enable-automatic-updates-ios-12/
Posted by: josephmadve1941.blogspot.com
0 Response to "How to Enable Automatic Updates in iOS 12 (Guide)"
Post a Comment